
 Call for free estimate and shop at home

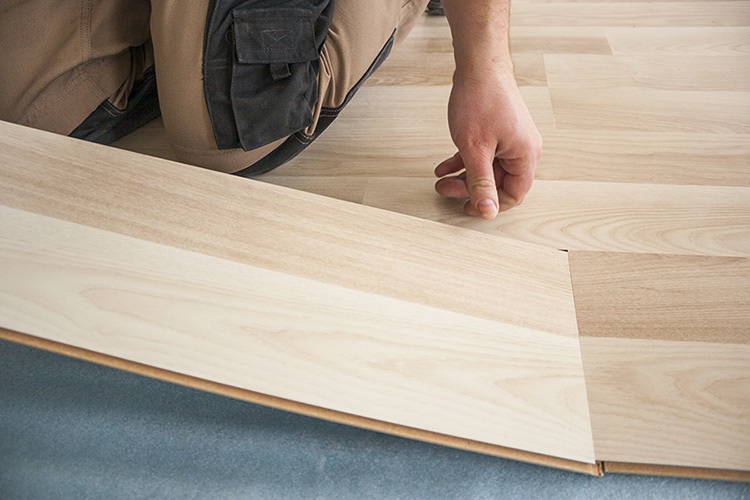
You only get one “installation day” for a new floor. When the crew pulls up, you want your home ready so the work starts right away, runs on schedule, and leaves you with a beautiful, long‑lasting result. After 50+ years of installing and repairing floors across South Florida, we’ve seen how a little prep makes a big difference in how that day feels for you.
Below is a simple, practical game plan to get your space—and your family—ready before the first tool comes through the door.
Step 1: Clarify What Your Installers Are Handling
Before you move a single chair, make sure you understand where your responsibilities end and your installer’s begin. Some companies expect you to remove all furniture and old flooring; others include more support. At Don Bailey Flooring, our flooring installation and repair services are designed to streamline that process, but it still helps to confirm details in advance.
Ask your installer:
- Which rooms are being done, and in what order?
- Who handles furniture, appliances, and toilets (if any are in the work zones)?
- Is old flooring removal included, or do you need to tackle that beforehand?
- Where will cutting and staging happen—driveway, garage, or indoors?
Knowing these answers a few days ahead lets you focus your energy on the tasks that are truly yours, instead of scrambling when the crew arrives.
Step 2: Clear the Path—From Driveway to Room Corners
Installers move large boxes of flooring, tools, and underlayment in and out all day. Anything in their way slows them down and raises the risk of dings or scuffs.
Start outside and work in:
- Make sure the driveway or parking area has space for the crew’s vehicle.
- Unlock side gates or service entrances if they’ll be used.
- Clear hallways and stairways of shoes, plants, small tables, and décor.
- Empty the rooms being worked on of smaller items: lamps, artwork, electronics, and anything fragile.
Large pieces—beds, sectionals, big dressers—may be shifted by the crew if that’s part of your agreement, but every loose item you pack up ahead of time means less risk and a faster install. If you’re updating multiple rooms, many homeowners in our service areas temporarily stack boxes in one “safe” space, like a guest room or dining room that isn’t being touched.
If you’re still finalizing material choices, this is also a good moment to review the specific product you selected—carpet, waterproof flooring, hardwood, or tile—so you know how much height it adds and whether doors might need trimming.
Step 3: Protect Adjacent Areas and Plan for Dust
Even with careful installers, cutting, demo, and fastening can kick up some dust and noise. In older homes especially, removing existing floors can reveal surprises, which our team can often address through repair, but it’s wise to protect the rest of the house.
Simple prep steps help:
- Take down or cover delicate wall décor in nearby hallways.
- Remove curtains that hang close to the floor in work areas.
- Set aside a few old sheets or plastic drop cloths to drape over nearby furniture.
- Decide which doors will stay closed to keep pets and kids out of the work zone.
Because of South Florida’s humidity, installers may need good air circulation to help adhesives cure and materials acclimate properly. Plan for a day of open doors, fans, and some background noise, especially if you’re working from home or have napping children. If you’re unsure how long your project might take, our team can walk you through typical timelines when you explore our flooring services.
Step 4: Think Through Family, Pets, and Daily Routines
Installation day is easier when you treat it like a mini‑remodel, not a regular weekday. You don’t have to leave the house, but you do need a plan.
Consider:
- Where kids will play while certain rooms are off‑limits.
- Whether pets should spend the day in a closed room, with a neighbor, or at daycare.
- How you’ll access a bathroom, kitchen, or bedroom if those spaces are being worked on.
- Any deliveries or appointments that might conflict with the crew’s access.
For multi‑room projects, many homeowners in Miami‑Dade and Broward set up a “temporary living zone” with essentials—coffee maker, a few dishes, pet supplies—so they’re not constantly stepping through work areas. The clearer the boundaries, the safer and smoother the day feels for everyone.
If you haven’t chosen your installer yet, reading what other homeowners say about their experience can be reassuring; our customers share real‑world installation stories in their reviews and testimonials.
Step 5: Do a Quick Pre‑Arrival Walkthrough
The night before or morning of, take five minutes to walk the job areas with fresh eyes:
- Are floors free of toys, cords, and throw rugs?
- Are closets in those rooms emptied at least along the floor?
- Are valuables, medications, and sensitive documents stored away from the work zone?
- Do you have a clear idea of where transitions between rooms will go?
If you’ve had any past issues—squeaks, soft spots, or minor buckling—make a note to point those out to your installer before work begins. Many concerns can be handled as part of a professional installation or repair, especially when you’re working with a team that stands behind its work with a 12‑month installation warranty, as we do at Don Bailey.
A short conversation at the start of the day helps your crew prioritize subfloor fixes and ensures you’re on the same page about how the finished floor should look and feel.
A little planning before installation day pays off in less stress, fewer surprises, and a floor that looks like it was always meant to be there. If you’re ready to update a single room or your whole home, we’re happy to help you map out materials, timelines, and prep. You can discuss your project and request a free estimate through our simple online estimate form.


